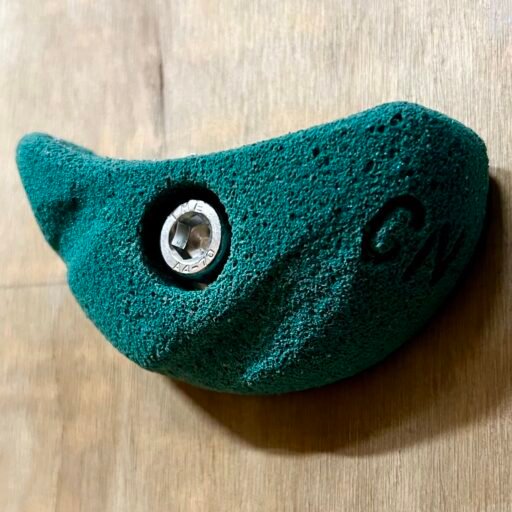
Designing holds is fun and creative. Below are some things that you should think about regardless of whether you are designing and making Wood Holds or Polyurethane Holds. In addition to this climbing hold maker has Designs for Wooden Holds and Designs for Polyurethane Holds to help you get started or to take adapt to suit your need.
Creating Sets
What does the full set of holds you want look like? What are the current hold types are you missing or need more off?
One method of setting a spray wall is to split the area into Zones with the same number of each type of hold in each zone. This then lets you set an all jugs problem or an all crimps problem over the same area of wall. Thinking about if you have the right balance of holds to create zones is a good way of working out what type of hold you want to make next.
Matching to the intended wall
Holds should work well with the size / amount of space the wall you intend to attach them to takes up and the angles of the walls. e.g. will the hold work on a 45 degree section of wall?
Often large volumes placed in a small space create short term interest. Initially a large volume creates an interesting problem but often getting round or over the volume results in very similar moves regardless of the holds.
Is the space used for something other than climbing – holds could be annoying if they stick out too far in certain places.
Variety
The greater your variety of holds the more interesting climbing on them is going to be. As well as designing a wide variety of shapes you can also mix different construction methods and mix your holds with commercially bought ones.
Different people come up with different ideas when designing holds. A home wall peppered with holds designed by friends makes for a good talking point and people love coming back to climb on holds that they designed!
Iterate
It’s tempting to try to increase the efficiency of your hold making by completing each step in the process with batches of holds. Especially early on consider completing one or a few holds at a time so you can learn for the process and then apply those learnings to the next hold.
Matching Holds to Objectives
Who will use the holds and what are they climbing on them for:
- Is it a training tool?
- Will kids be using it?
- will a variety of climbers be using it?
- Are you just trying to train strength or do you want to training endurance too?
Don’t Cause Injuries
Holds should be comfortable and fun to climb on. Injuring a finger training is the last think you want to do. Also, holds that are easier on the skin allow longer climbing sessions!
As a rule of thumb the more of your fingers you can get round a hold the smoother it needs to be. The tip of your digit can feel quite comfortable on a sharp edge or lip. By the time your palm is contact the hold needs to be a lot smoother and rounded
Shapes
You can try to mimic the shapes and textures of different rock types but also your holds don’t need to all look like real rock at all.
Texture
It’s fun to play around with the texture of where your hand will contact the hold, this applies particularly to Polyurethane Holds. Be careful though as they can quickly become too rough and painful for fingers and end up tearing skin. (They will however make good footholds at the bottom of your wall – so don’t be scared to experiment)
Hard / Difficult holds
It’s good to have some holds that you can’t use easily – this will push you to try harder moves, help improve your strength and technique over time and allow other stronger climbers to enjoy your holds.
Forcing Intended Use
Think about whether the hold is intended to be used in a certain way. For example when making crimps you can smooth out and taper the space below the crimp so that the climber can’t pinch it. It’s very easy to end up making a lot of holds that can be pinched.
Blocking
By blocking out the back of the hold you can create larger stronger holds with a smaller grip space.
Contact Area
Think about the contact area of the hold – One finger, One hand, two hands, rails…
Orientation
Will the hold support being placed in different orientations? E.g. can it be a crimp in one direction and a pinch in another? Could the hold be set as a Sidepull (pulled sideways rather than downward), a Gaston (push outward against, like opening elevator doors with your elbows) or an Underling (held from underneath and pulled upward on).
Foot Holds Only
Particularly at the bottom of the wall their will be holds that are only used for the feet. Screw on foot chips are a great example of this (basically crimps and small slopers for your feet)
They are worth distinguishing when designing and making holds
Method of Attachement
How will the hold be attached to the wall? The main options are:
- Using Screws: This allows the hold to be placed anywhere and is the cheapest option. However it takes longer to move or re-position holds and if you do this regularly you will end up with lots of holes in a plywood wall.
- Using a Bolt: You have a choice between Cap Head Bolts (with space for a washer) and counter sunk Bolts. M10 (metric) or 3/8″ (Imperial) is the standard size. In order to attach holds to a wall with bolts, the wall will need to be first fitted with t-nuts
You will need to design your hold to allow for the attachment method you have chosen for the hold. In addition to creating the hole you want to aviod the head of the bolt or screw protruding from the hold as it could interfere with the way the hold is intended to be used.
Note: You can use one or a mixture of methods depending on the size of the hold and where you want to place them.